One of my favorite things about electronic mixing and Ableton is the power of effects. I can morph a sound into unimaginably different new sounds with effect processing. You can layer effects and change a simple sine wave into a complex sound with pulsing auto filter, unique chorusing, and undulating phasing. A big change in my sound design has been learning a new technique called Parallel Processing. This opened even new dimensions to my sound design.
Processing What?
So to start, let’s define what Parallel Processing is and Serial Processing.
If you have a sample and you add an effect in Ableton, you start by processing in Serial. You can add a Chorus, then a delay, a reverb, you name it. What is happening is the sound is being processed in a series, or one after another. The sound goes through the chorus, and then it goes into the delay and so on. That is, a linear, or right to left way of processing the sound. This is Serial Processing.

There is another way of processing and that is Parallel Processing. Parallel Processing lets you take a sound and separate it to multiple new chains. Each chain, then processes the signal separately and at the end, it all comes back together. This approach lets you do all sorts of new creative things. You can separate a sound to different frequency ranges. You can then add different effects to different frequencies. Or you can do all sorts of new creative effects.
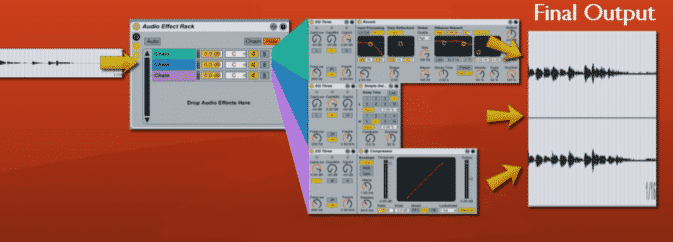
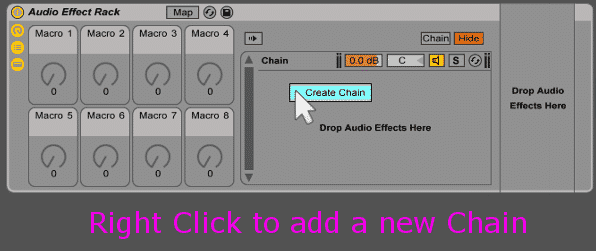
We can easily do this in Ableton Live by adding an Audio Effect Rack. An Audio Effect Rack lets us add new chains. Each Chain can process the same original sound differently.
The video below will show off the basics of Parallel Compression and then some more advance techniques in using it.


