Coming from making an album and in studio work to a live set brings a whole other world of changes and things to think about. It can be daunting after spending so much time in creating a track to then put it into a live set. This tutorial is going to take you through my own process and show a simple and streamlined way of doing it. These techniques will lead to a great live performance that keeps a good amount of quality from the final bounce down. I will show off the ideas and if you want to get a preset Live Pack with an example set, in depth videos, and more then check out the Subaqueous Live Set Pack in the store.
Bounce Down the Track
The first thing to do is go to your ableton project with the song you are getting ready for a live set. It is a lot easier for workflow in mastering and composing as well as for this step to keep your tracks organized. By grouping your tracks into groups you can easily bounce them down as well as during the mastering process you can have all your bass in one group and eq it and so on.
Here is an example of a track I have grouped together:
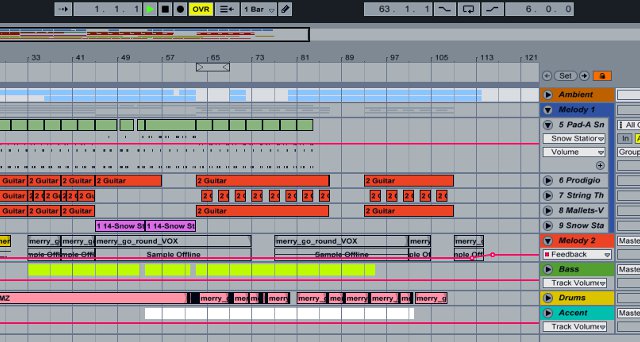
Usually I go with these groups:
- Ambient
- Melody 1
- Melody 2
- Accent Rhythms
- Drums
- Kick
- Bass
- Bass2
As you can see in the example I don’t use all of these categories, and I fit the sounds into the groups that I feel fit best.
After getting them in groups is the fun and time consuming part of bouncing it all down. What I do is solo each group and bounce it down. So I would take “ambient” and solo it. Then Export Audio and save this track as “trackname_Ambient” And would continue this for all of them. Make sure you make the analysis file as well to make it easy to drop in a session.
The Cut
Now that you have the elements bounce you can cut it up into sections for triggering and the live set. You can take these files and load them in stacked on different tracks. I generally load these files in new tracks on whatever Live set I use for djing and performance (just makes it easier as I will show).

They you can just highlight the section and cut it (Ctrl E). Loop the section to make sure it sounds good and do this for each section of the song. Once that is down you can drag and drop these parts into your live set to make clips to trigger.
The Live Set

As you can see I just dragged these clips into my session view under the different categories. This way I can trigger a whole section (into and so on) or just a clip. Doing this to your songs you can also do live triggers and “mashups” of your own music and switch elements around. From here you have a good start of your live set.
To learn more in depth on my live set, have a preset template to work from, and get a host of live effects then check out the Subaqueous Live Set Pack for sale at the store.


